This is my very favorite wall in my house, so I decided to officially document the process here...


On Saturday, August 5th, 2017 -- (the day after hosting my first Friday night dinner!) -- Mom came over to help me with my photo wall. We had a nightmare of a time figuring out what would make the pictures stick to the wall. After two trips to Michael's and trying Tacky glue, staples, calling several stores to see if they carried white-colored staples, and hot glue (which terrifies me and dried way too fast to work for this), we finally stumbled upon Aileen's Ultimate Multisurface Adhesive, which worked like a freaking charm - hooray!!

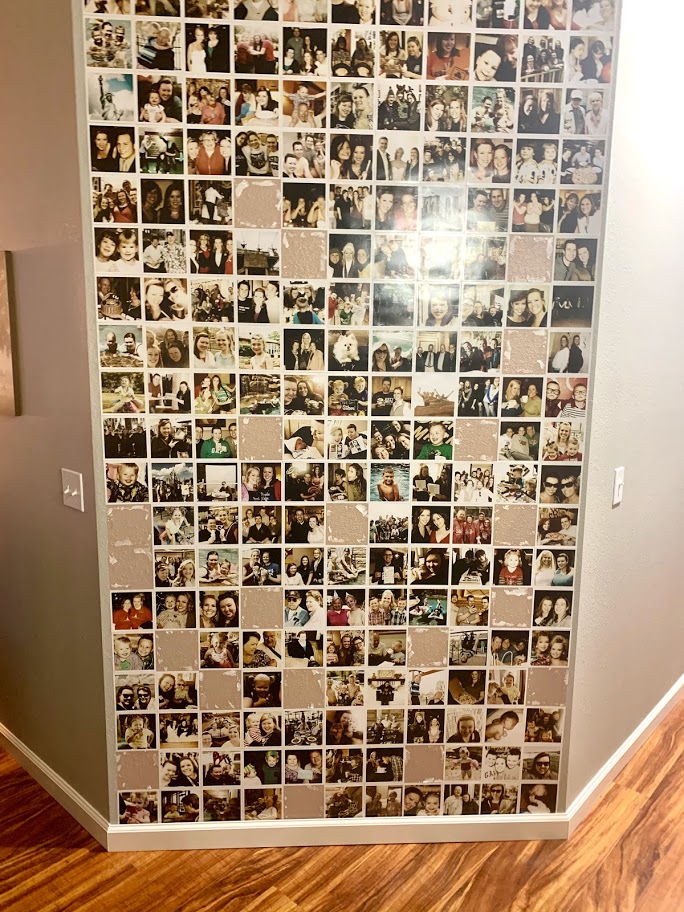
Here's the section I did on the ladder... we went right over our lovely glazed diamond on that pink wall... which is still there behind it to this day.

Once we figured out our system, we were all over it! We laid them out on the table a few rows at a time, making sure we didn't have too many of the same people or event clumped all together. Then Mom put glue on them and handed them over to me, and over the course of six hours, we individually glued 231 5x5 square pictures (21 rows of 11) to my wall, trying to make it look like little tiles. I applied the same filter to all the pics I ordered so that they are in color, but slightly muted and toned down.

Since then, my house has been repainted to a happy Mindful Gray. I used an artist brush and carefully painted by the margins of this wall. Then Rach decided to do a black and white wall like this at her new house! It turned out pretty awesome, and ironically was the exact same size wall and number of photos as mine.

So when I was ordering the pics for that, I got a few extras to update my wall. The pictures pulled off easy enough, although it'll probably be rough to get every bit of paper off if or when I eventually move!
I ordered my pics from a site called MailPix, but I got Rachael's for a much better price from FoxPrints, so definitely go with them if you're thinking about doing this!! I needed 5x5 pictures with a white border, and FoxPrints has those for a really good price.
So basically, it boils down to this:
- Measure your wall and figure out how many pictures you need to cover it.
- Choose the photos you want to use + 10-15 extras for good measure.
- Crop them all to a square, and apply a color filter or a black and white filter - whatever you prefer. Mine are in color, but all a bit muted by a similar filter.
- Order them as 5x5 square prints with a white border here from FoxPrints.
- If you want them in a certain order, plan that out... but hodge podge randomness is also great here.
- Use Aileen's Ultimate glue pictured above to glue them to the wall one by one - they're square, so it's easy enough to keep it all straight!
- Admire your happy photo wall and relive some great memories!!! ❤
No comments:
Post a Comment